Today, we met with colleagues to talk about AI stuff, but what we really talked about was learning. During the first part of the workshop, I offered some reflections on examples of coursework completed by various students, some using AI and some not. During the second half of the workshop, we got into an interesting convo, asking each about the learning our assignments promote: when and why does our course design invite students to use AI tools?
Here’s the doc I share during the discussion. I’d love to hear from you if have thoughts or want to collaborate on the next Showing Your Work with AI discussion about learning, course design, and engagement.
Still thinking about your course design? Modules? Pages? Discussion Boards? Studio? Quizzes? In this video, I explain and show how I designed my course and the reasons for doing it. Come in and take a look! I hope this helps you think about how Course Design is much more than just how your course “looks” but how it actually engages students.
In my English composition classes, I really, really hope to promote reading as an essential step in the writing process. Since I started teaching, I’ve relied on low-stakes writing assignments–journaling, in-class writing, annotations, etc–to promote mindful reading habits linked to larger writerly tasks. When I started teaching online, I simply adopted a digital journal inside the LMS, that is, until we switched to Canvas, which does not have a journal tool. Time once again to bend Canvas to my pedagogical will.
In this video I share two approaches that provide students with a space to explore texts and experiment with ways to value the act of reading; space that also provides me an opportunity to intervene, celebrate, and nudge students as their develop their own unique reading process.
https://youtu.be/kMxXziJIQo8
Here’s a guide for how to highjack Canvas’ Discussion tool to create a reading journal:
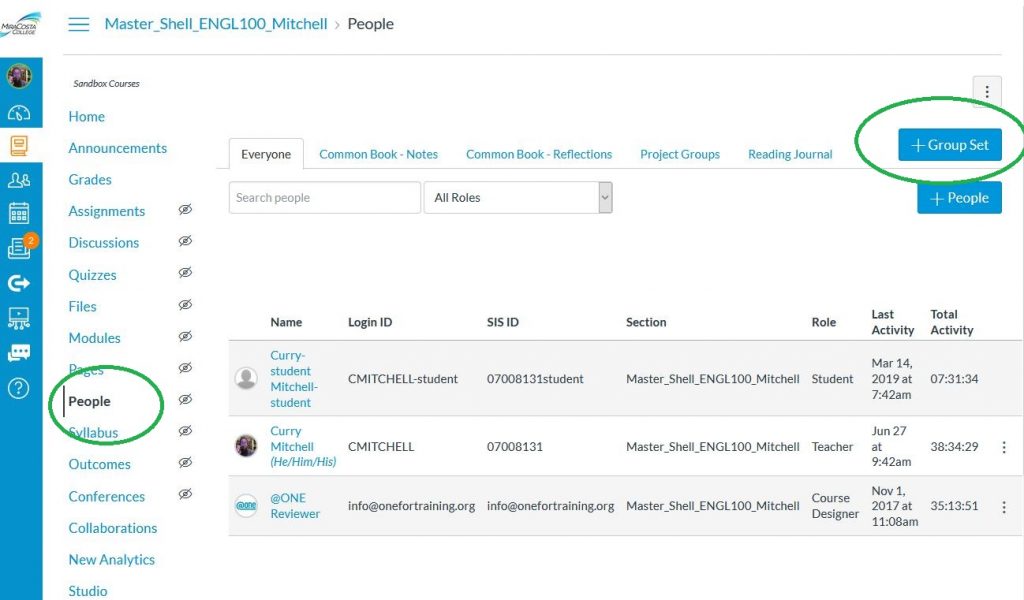
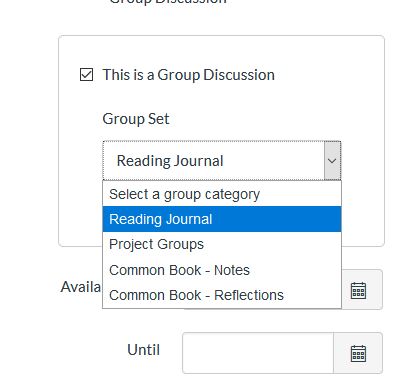
1. Navigate to the People tab and create a new Group Set
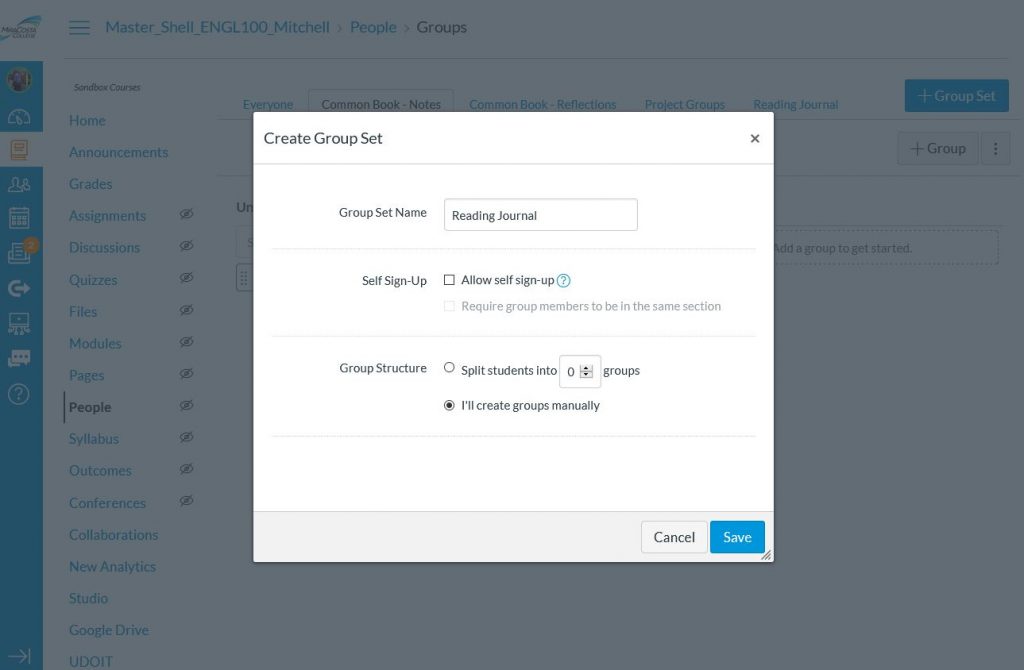
2. Title the Group Set, select the “I’ll create groups manually option,” and click Save.
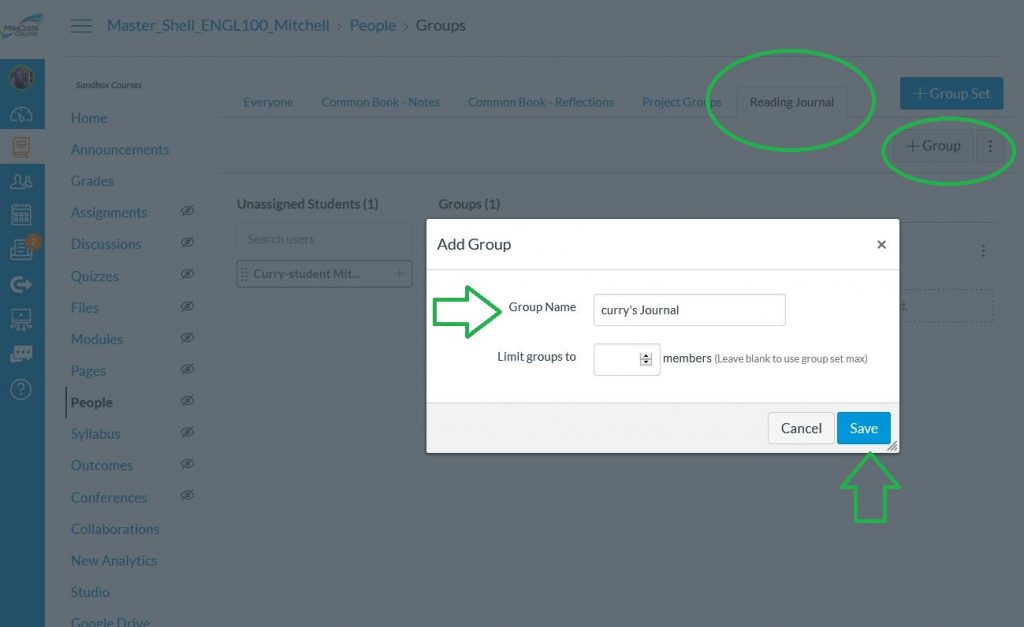
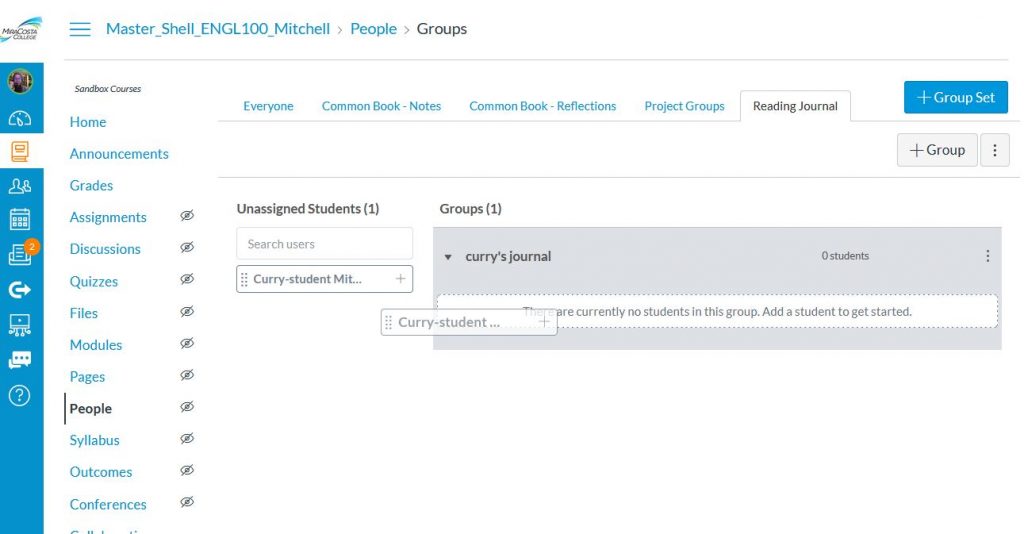
3. Find the tab for the group you just created and then click the +Group button. Create a group for every student in your course. Once you have a group for each student, drag their name into their group. This may take a little while…
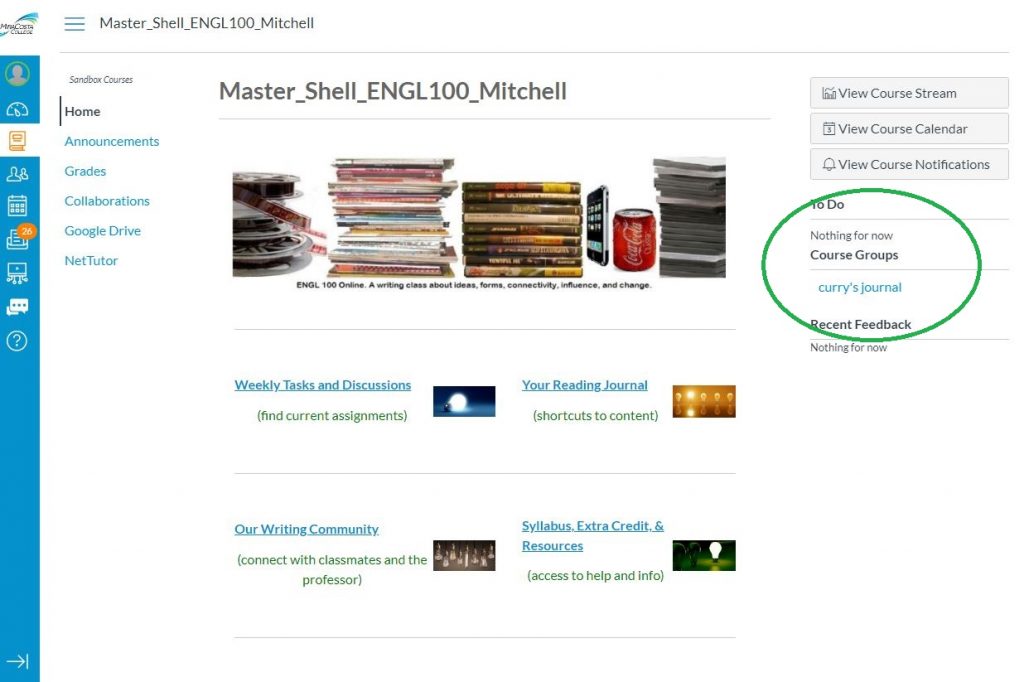
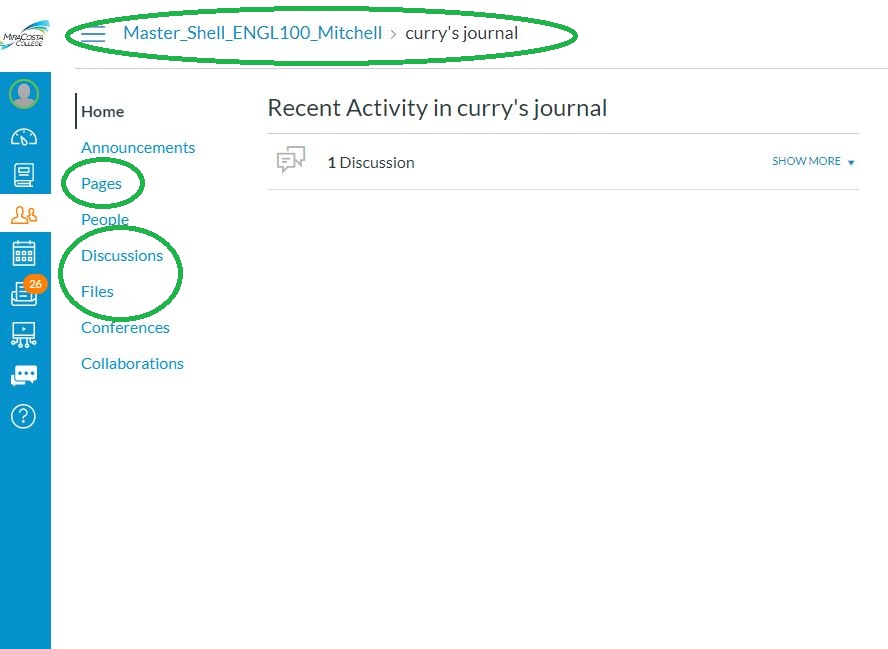
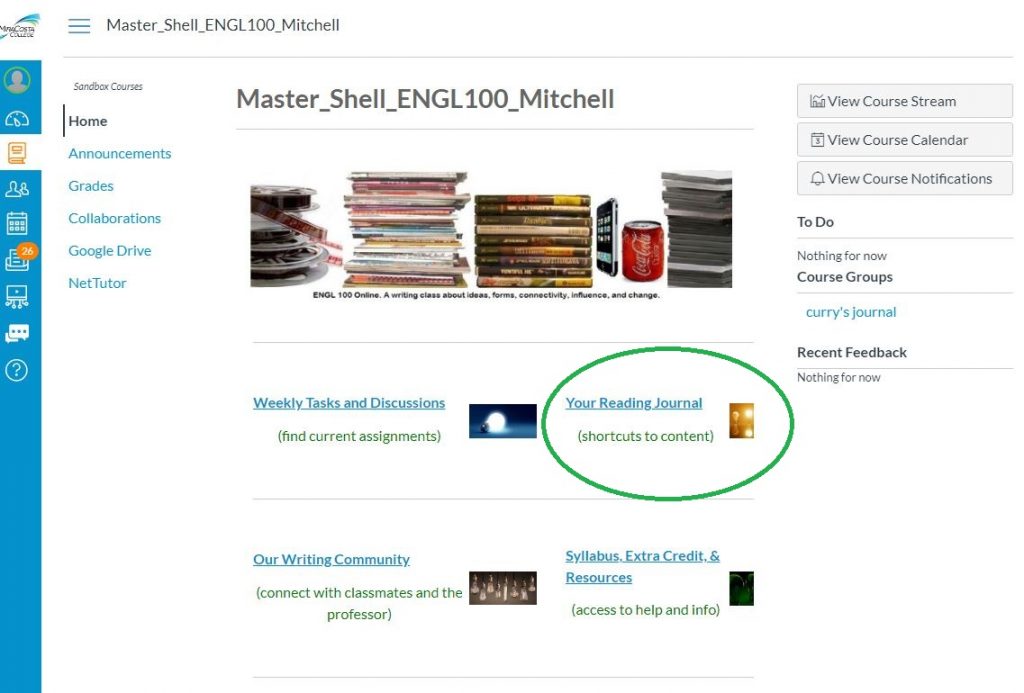
When your students log in, they will see they have access to a link under Course Groups. When they click on this link, they will have access to their own space in your Canvas course where they can upload files, create pages, etc.
Here’s what that looks like on a desktop
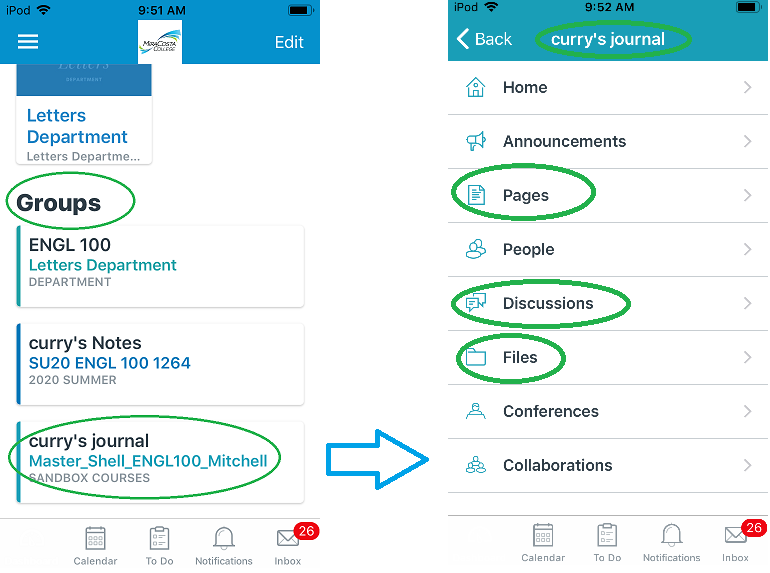
Here’s the view using Canvas’ mobile app
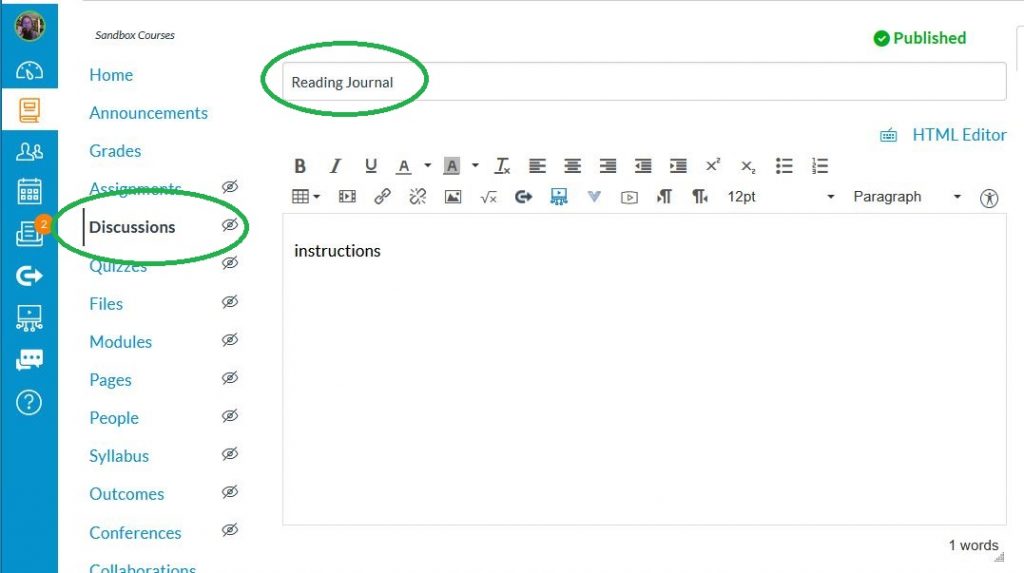
I find it a little hard to find everything students include in this space, so to make things a little more simple, I create a Discussion board and set it up as a group assignment.
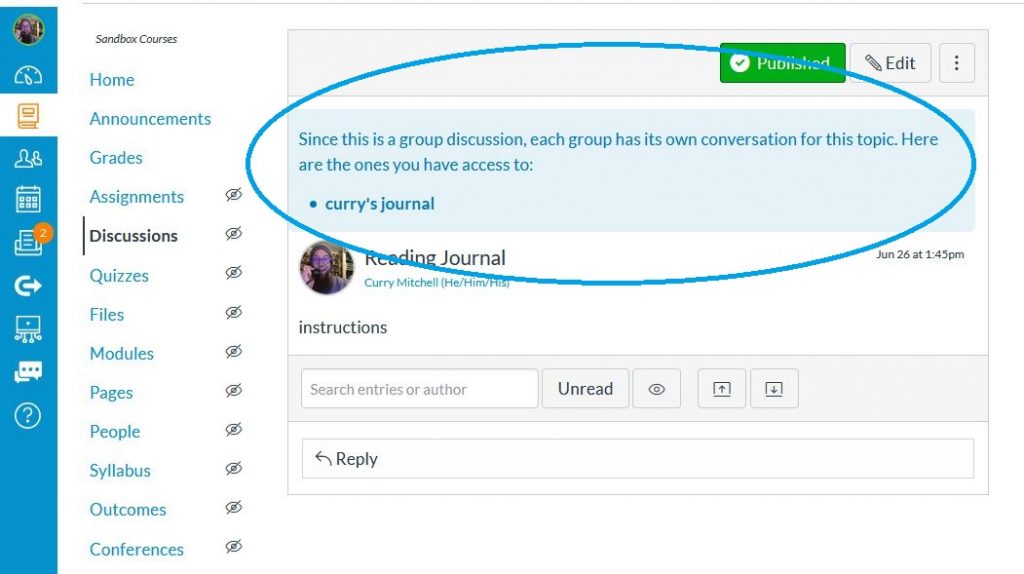
I place the link to this discussion on the home page, and when students click into the discussion, they only have access to their own contributions.
Once they access the Discussion link, they simply click the “Reply” button and add their latest journal notes and reflections. This space becomes a repository for their ideas throughout the semester. Check out minute 2:06 in the video above for what this journal-discussion-Canvas-thing looks like for students.
In this series of vids, I provide an overview of how I will share resources with you all and then move into into some early communication with students to help them access Canvas and our course successfully.
In this video, I share my initial email communication with students and preview three student videos that are sent pre-semester to welcome, engage, and connect with students.
Here is a link to the video I send to students in the pre-semester email which guides them to logging on the Canvas and provides a basic overview of our course design/layout.
This is the video which provides some tips and guidance once students are in our Canvas Course how to approach the content for each week and navigate the course more easily.
Finally, this is a video that shows students how to use some of the most basic but useful tools when viewing Studio videos.
When I first started redesigning my ENGL 100 class for the online space, I found myself trying to mostly migrate my two-day per week lesson plans into an online, asynchronous rhythm. Instead of talking in class, we’d post to a discussion board. Instead of writing on the board, I’d create a slide-deck presentation and screencast it. Instead of modeling close reading with a doc cam, I’d snap a bunch of pics of my annotations, and set these in montage to some smooth Julian Casablancas tunes.
For the most part that worked, but after reading my first semester student evaluations, I found I was overwhelming my students with 2 lectures a week, 2 discussions a week, 2 workshops a week…in other words, the direct migration of my onsite curriculum into the online space needed tweaking. There’s something about the dynamic, synchronous class meeting that affords one set of active engagement with content and something about the interactive, asynchronous space that affords another.
One way to consider the redesign possibilities of your curriculum is to step back and consider the big picture and the minutia of your course: a backwards design approach.
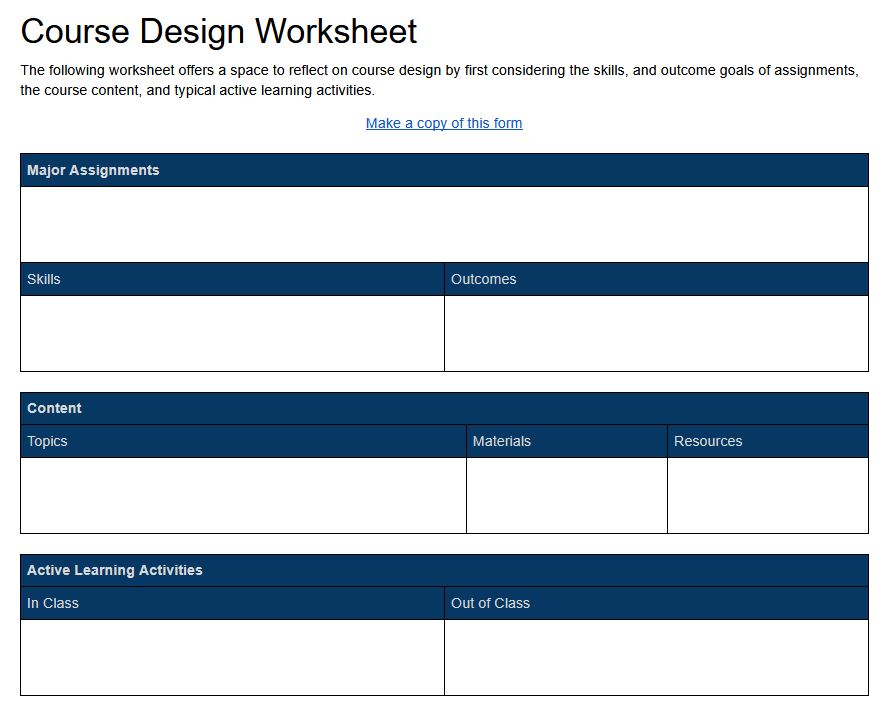
I’ve created a worksheet–based on materials I received in an @One course on Course Design–which encourages this approach. Click the image above or access the worksheet to make a copy here.
This worksheet moves from the big picture of course curriculum to the particulars of how this curriculum scaffolds over the semester’s schedule. Next, this worksheet moves from thinking about the tools and practices developed for a scheduled, onsite class to thinking about what these tools and practices might look like in a mostly asynchronous, digital space.
https://youtu.be/-9YInNjxYfM
I’ve started to use this worksheet to think about how I will redesign my ENGL 202 class as an online course with one scheduled meeting per week in Zoom. So far, I find myself moving back and forth from big picture to details as I think about the course as it currently exist. I also found the SLO’s for ENGL 202 very helpful as a source of orientation for designing a recursive reading, “arguing,” and writing experiences. I’m pretty sure I will use this pattern to organize and assign content week by week.
https://youtu.be/Ggvase3bpE0
Finally, I’m starting to think about what Canvas will eventually look like when I build ENGL 202 online. I will take some elements from my current Canvas design for ENGL 202 onsite, some elements from this season of using Canvas, Zoom, and Google docs to teach ENGL 202 remotely, and some elements of my ENGL 40 course design, a sentence crafting class I’ve been teaching online for a couple years now.
https://youtu.be/2aQkAr_tXj4
My approach certainly is only one way to think about online course design. I hope we can all share our breakthroughs and work with one another to troubleshoot challenges. I’m looking forward to collaborating with you all!
In the video below I discuss how to create a consistent course that both satisfies regular and effective contact hours and allows you to still be creative and flexible. Maybe there’s something in there that can benefit you as you think about further developing your online courses? Oh, and I give a shout out to the Talking Heads! Why? Why not.